Paint Your Nails To Last!

I went to the salon on the weekend (first time!) for a manicure and pedicure. I decided to pick the new OPI Euro Centrale polishes to try out. For my toes I got ‘Suzi’s Hungary Again!’, which is an awesome creme pink with a touch of shimmer. For my hands I got ‘Vant To Bite My Neck?’, which you can see pictured above, is a nice dark, deep purple creme.
I really didn’t think that I wanted to get any of the polishes from this collection when it first came out, but now that I’ve stared at these two colors I am really loving them! The more I look at them, the more I want them! So, I may be purchasing them in the future. Now I am more interested in the other colors from the collection like, ‘You’re Such A Budapest’ – a light creme lavender color, which compliments the the two colors I got painted on my hands and toes. I would love to use these polishes in some nail art together. The reason I am really loving these polishes now is because pictures do not do them justice. I have seen them swatched several times in pictures, but they are just not the same as in real life, they are more alive!
Anyways, I had so much fun getting the manicure and pedicure! But my only disappointment was that my nail polish chipped after a few hours of getting my manicure done! You can see this in my two pictures and this is the reason why I decided to post about my manicure for you. Sorry about the red hands, I guess I should have waited to take the pictures until my hands weren’t so red. I am pretty sure I ran them under hot water right before I took pics, which was a bad idea!

I really thought that a manicure from the salon was supposed to last a lot longer. However, I did notice why mine didn’t last. When I paint my nails I do it differently to prevent chipping. At the salon they just painted my nails… And so I have decided to show you how I paint my nails to make the polish last longer! This is actually a request from my friend, Cassie. We went to the salon together and I was telling her about the chipping and why my nails chipped. Thank you very much for a great idea, Cassie!
Paint Your Nails To Last:
This process is done for all layers of polish. For the below pictures, I am using my favorite OPI polish, ‘I’m Not Really A Waitress’.
Follow these steps for basic polish color to make the most of it:
Always start with a base coat to protect your nails and prevent staining. I believe that red polish is the absolute worst for staining! If you paint your nails red without a base coat your nails will turn yellow and it will be very noticeable. I like to use different kinds of base coats depending on the polish I am using. For example – if I am using mainly China Glaze, I will use the China Glaze – Strong Adhesion Base Coat. If I am using mostly OPI polish, I will use OPI – Natural Nail Base Coat. They are both my top two base coats. Lately though my number one base coat of choice is OPI – Matte Nail Envy because it helps to strengthen your nails so they grow.
Then I do two to three coats of polish, depending on how sheer the polish is.
Lastly, seal your polish in with a top coat to prevent chipping. The best top coat I have ever used is Seche Vite – Dry Fast Top Coat. If you are very impatient with drying your nails like me, then this top coat is for you. Nails will be dry to the touch in a minute and be completely dry in about 10 minutes. It also adds a beautiful smooth shine to your nails and will smooth out your layers of polish, which is especially good for nail art. There is also very minimal smudging. Here’s a hint to prevent your nail art from smearing all over when using your top coat – place it on your nail with as little strokes as possible. I like to goop on the Seche Vite with three stokes: left, right and across the top of my nail. Then I get no (rarely very minimal) smearing.
Paint Your Nails Like This:

Wipe off the excess polish from the brush and start in the middle of the nail, a few millimeters above the cuticle.
Drop the bush onto the nail and slightly push the polish down to the maximum spot where the polish will go and stroke up.
Next, go to the right side and stroke up, placing the polish on the right side of the nail.
Do the same with the left side.
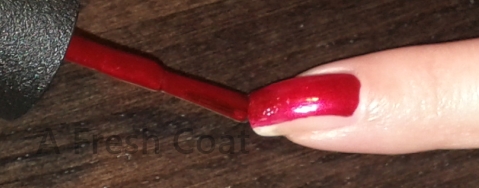
I like to do one more brush stoke up the middle of the nail to even out the polish.

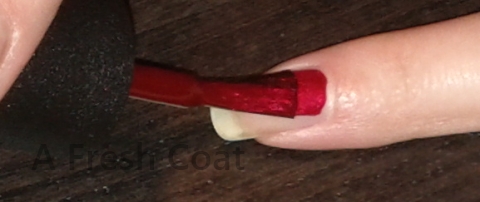
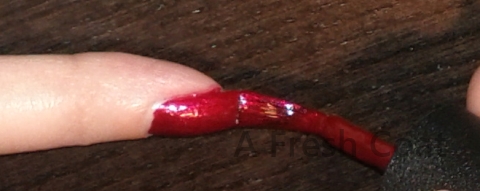
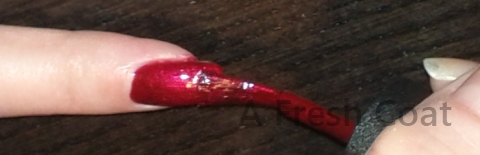
Now here’s the most important step – I paint the top of my nail by brushing the polish along the tip of the nail so the polish wraps around the nail. It prevents chipping! This is what they did not do at the salon and this is exactly why my beautiful manicure started to chip within a couple of hours. Just note that you will have some polish on the other side of the nail, which is what is supposed to happen, as pictured below. This is the wrapping technique.
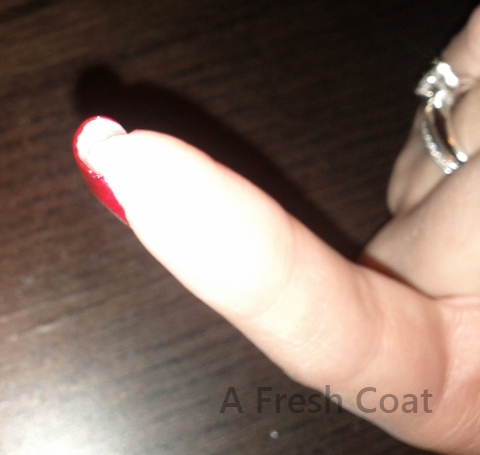
Make sure you wrap all layers of polish including the base and top coats.
Happy painting!